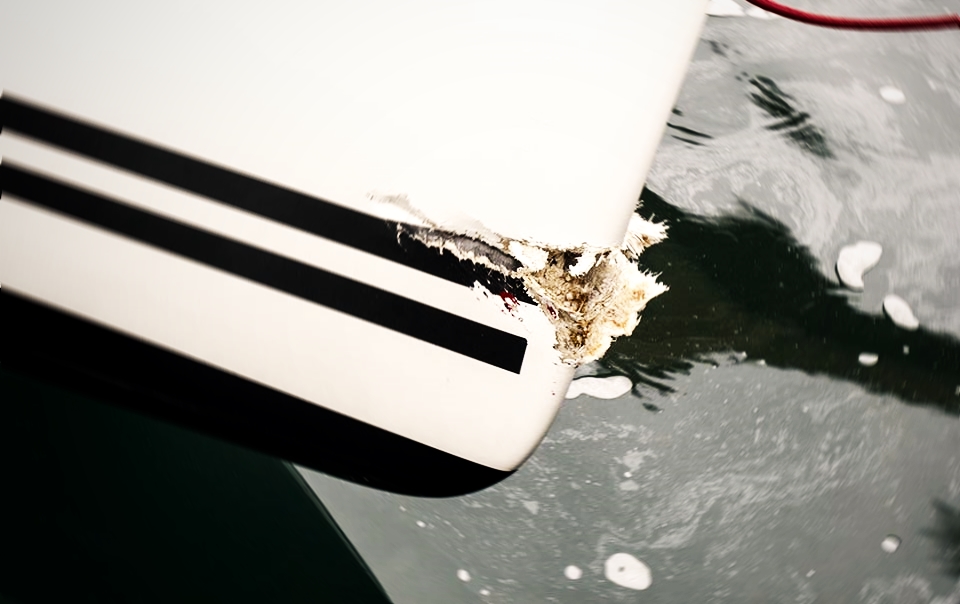
You take good care of your boat, paying special attention to even the smallest cracks and dings that form in the hull. That’s why a hole in your hull can be so alarming. If it’s not addressed, it threatens the integrity of your boat to a degree well beyond surface dings and marks. But what if a hole in your hull came from the outside? Here’s what you’ll need to know about how to repair a fiberglass boat hull from the outside.
Prep Your Materials
 Working with fiberglass is different than working with a material as straight-forward as, say, wood. It’s important to have the right materials before you get started, which includes:
- Fiberglass patching kit. Patching fiberglass includes a lot of variables. You’ll need layers of fiberglass, liquid epoxy, and more. Browse around for a complete fiberglass patching kit and get a sense of what’s involved before proceeding any further.
- Construction materials. Gather sandpaper for sanding the outside edges and an epoxy brush for applying the epoxy for the fiberglass.
- Adequate cleaning supplies. The first step is to clear the area of debris and clean out the affected part of the fiberglass boat hull. Use Boat Cleaner as an effective, non-damaging cleaning agent.
Fiberglass Boat Hull Repair Steps
Fiberglass boat hull repair sounds complicated—and it can be for first-time boat owners. We break it down into its essential steps:
- Preparation. Clear the area of any remaining debris, clean it out, allow it to dry, and sand down the affected area for a smoother application later on. You’ll also want to procure some fiberglass backing material if the hole goes straight through the hull.
- Measure and recreate. Measure the precise size of the hole. Your fiberglass patching kit will include pieces of “fiberglass cloth”. The first piece you cut out should be about the same size as that hole. You’ll cut out in larger layers, which you can then place below this first piece in ever-larger circles. Then use the mixed epoxy in your fiberglass patching kit to wet the area you’ve sanded out on the exterior of your hull and subsequent layers of fiberglass.
- Cure. Allow the applied fiberglass to properly cure—taking care to follow any instructions in your kit. This should give you a relatively even patch. Once cured, you’ll be able to sand this area down for even consistency. Your fiberglass patch kit should give you a second step of epoxy to apply next for greater consistency. Apply per the instructions and allow time to cure in a dry, well-ventilated place.
Fiberglass can feel complicated the first time you have to address an exterior fiberglass hull issue, but when you know the essential steps, you’ll have a much clearer picture of how it should all take place. And it doesn’t hurt to have a few boating products in your corner, either. Browse BoatLIFE for all the other cleaning and repair materials you need to maintain a quality boat.