


A dent or hole in your sailboat’s hull can feel like damage
to the entire boat. But if your hull is made from fiberglass, you may have more
options than you initially thought. We put together this sailboat hull repair
guide to help!
Step One: Preparation
You won’t be ready to tackle sailboat hull repair until you
know a bit about what to expect. That means adequately preparing the area for
the repairs. Here’s what you’ll need to know:
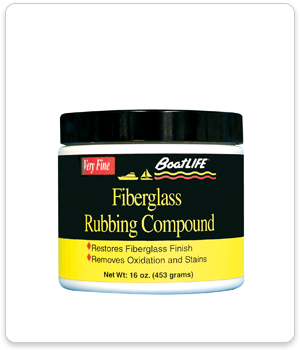
- Clean the
affected area out and remove the wax. Use a product like Fiberglass
Rubbing Compound, which prepares the area for a future wax. You can
then rinse this area with fresh water and allow it to dry, washing away any
leftover debris that might have occurred with the damage. - Gather
the essential equipment: a respirator (for grinding), an air-grinder with a
sanding disk, a fiberglass mat, acetone, an electric buffer, safety goggles,
gel coat (and applicator, such as a spray gun), fiberglass catalyst and resin,
a stir stick. Don’t forget accessories including buckets and rags to make the
overall process that much smoother.
Step Two: Grinding
Wearing the respirator and safety goggles, grind down the
damaged fiberglass with the sanding disk, preferably 36-grit. Sand the edges
of the affected area—such as the edges around a hole—to a slight sloping angle.
This will create more overall surface area for your added fiberglass repairs to
adhere to, which in turn promotes adhesion and long-term bonding.
Step Three:
Fiberglass Repairs
Even if you’ve never used fiberglass before, you might be
surprised at how easy it can be to apply. But it’s important that you follow
the procedure:
- Cut out
enough fiberglass mat to cover the area with up to ½ inch around. Continue
cutting out these layers, expanding the area by an additional ½ of an inch each
time, until you find the original thickness of the fiberglass. The top layer of
fiberglass mat should cover the entire affected area. - Mix catalyst
and resin according to the instructions on your label. Use the stir stick
here to ensure that nothing else makes contact with the mixture. - Once the
mixture is ready, begin applying the fiberglass mats, starting with the
smallest. You might consider using a felt roller to ensure there are no
lasting air pockets at this stage. Be sure to apply evenly and flatly, working
carefully. - Continue
through to the largest fiberglass mat, and then allow time until the
fiberglass hardens.
Step Four: Finishing
the Hull
Once the fiberglass is hard again, you can sand it down for
smoothness and then apply the gel coat. Once you have the gel coat intact,
you’re ready to add a layer of wax to the outer layer, protecting the hull.
To make the process easy on yourself, make sure that you
read all labels and warnings, and thoroughly research fiberglass before
beginning. And don’t forget to browse BoatLIFE for some great
products that can help you along the way.

